
Using Z2 with a Transaction Manager
This sample demonstrates how to use Z2 with the Atomikos transaction manager. There is another sample that shows how to use Z2 with a Spring configured transaction manager. See sample-jta-spring. In contrast to that, this sample is less sophisticated but probably better suited to understand the underlying mechanics.
The Wiki page How_to_TransactionManager explains the general principles behind transaction handling in Z2.
This sample is stored in z2-samples.jta-plain. It implements exactly the same scenario as Sample-hibernate-basic with the exception of not using the built-in JTA implementation.
Prerequisites
Z2 has the following Java Version requirements
| Z2 Version | Min. Java version required | Max Java version supported | Max language level |
|---|---|---|---|
| 2.1 - 2.3.1 | Java 6 | Java 7 | Java 7 |
| 2.4 - 2.5 | Java 8 | Java 8 | Java 8 |
| 2.6 | Java 9 | Java 11 | Java 10 |
| 2.7 | Java 9 | Java 11 | Java 11 |
| 2.8 | Java 9 | Java 13 | Java 13 |
| 2.9b | Java 8 | Java 8 | Java 8 |
| 2.9.1 | Java 11 | Java 16 | Java 15 |
| 2.9.1b | Java 8 | Java 8 | Java 8 |
| 2.10 | Java 11 | Java 18 | Java 18 |
| 2.10.1 | Java 11 | Java 21 | Java 18 |
| 2.10.2 | Java 11 | Java 21 | Java 18 |
| 3.0 | Java 17 | Java 23 | Java 23 |
| master | Java 17 | ? | Java 23 |
Note: Most samples suggest to use the master branch. You may choose another version branch (please check the respective repository).
Make sure you have a corresponding Java Development Kit (JDK) or Java Runtime Environment (JRE) installed. If in doubt, go to Download Java SE.
Note: Running v2.1-v2.3.1 on Java 8 is supported by specifying
com.zfabrik.java.level=7
(or 6, if that is your desired compilation language level) in <home>/run/bin/runtime.properties. By this the Java compiler version detection does not fall back to a lower level.
You need to run Java DB as network server on localhost. This is explained next.
The application will create a database "z2-samples"
Running a Java DB Network Server
Previously to Java 9, the Java SE Development Kit (JDK) by Oracle provided the Java DB - essentially the same as the Apache Derby DB. That is not the case anymore. However, we use that Database implementation in our samples. In order to run those samples that illustrate use of a relational database, please follow the instructions below to install and run Apache Derby. Could hardly be simpler.
Step 1: Download and Install
Unless you have done so already, download Apache Derby DB and follow the installation how-to.
Note: You do not need to unpack Apache Derby into some global folder on your system. Instead you may want to use some local folder under your user's home folder. There is no problem installing and runnning different instances and configurations at any time.
Step 2: Run
Let's assume you installed (well - unpacked) into a folder $DERBY_INSTALL. Also, let's assume some Java Runtime Environment is installed and ready.
Simply run the following on Linux or Mac OS:
cd $DERBY_INSTALL
java -jar lib/derbyrun.jar server start
On Windows run
cd %DERBY_INSTALL
java -jar lib\derbyrun.jar server start
That's it. Apache Derby will be waiting for connections on port 1527.
Running the sample
mkdir install
cd install
On Mac-OS or Linux run:
wget http://download.z2-environment.net/z2/z2-base-v3.0.zip
unzip z2-base-v3.0.zip
On Windows download the archive and unpack using the Windows explorer. Make sure to unpack into the installation folder previously created.
This will create a folder z2-base.core that contains the complete version 3.0 z2-base installation.
Check out the sample
git clone -b v3.0 https://www.z2-environment.net/git/z2-samples.jta-plain
On Mac OS or Linux run:
cd z2-base.core/bin
./gui.sh
On Windows run:
cd z2-base.core\bin
gui.bat
(In order to check that z2 is up, when you see "Completed home process initialization", try http://localhost:8080/adm with user "z*" and password "z".)
Verifying
When everything is up, go to http://localhost:8080/jta-plain. You see something like this:
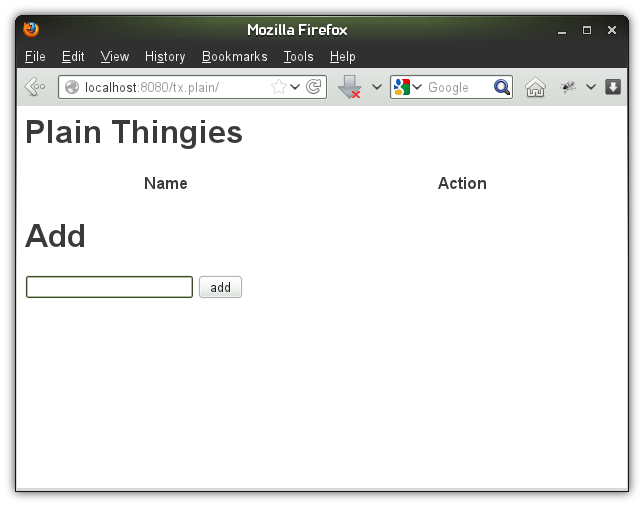
And indeed, the implemented function is rather obvious: Manage a table of strings - called Thingies in the sample.
Now to the point...
The idea behind this sample is to provide a template for transaction manager integration. Note that before you integrate with a complete transaction management system, you should be sure that you need it. Distributed transactions come at a price in terms of complexity and overhead of local transaction logs. If you do not have multiple data sources, or if those have no strong inherent consistency requirement you may well be better off without a full-blown, XA capable transaction manager. Please also see How to transaction management.
Detailed explanation
The sample has four modules:
- com.atomikos: This module holds the Atomikos Transaction Essentials libraries - the actual transaction manager implementation (via the mvn fragment mvnFragment ntry/com.atomikos/mvnFragment.properties).
- com.zfabrik.samples.jta-plain: This module implements supporting functions for the actual applications.
- com.zfabrik.samples.jta-plain.domain: The domain definition module. This contains the JPA entities and a "Thingy Repository" implementation.
- com.zfabrik.samples.jta-plain.web: The simple web application that lists the database content and allows to add and delete thingies.
In order to make Atomikos usable, it's transaction manager and user transaction implementations have to be configured and instantiated. All of that is done in com.zfabrik.samples.jta-plain in the form of Z2 components exposed for re-use by other modules. Similarly the Atomikos XA Data Source implementation is made available from this module (Note: You cannot -for all practical matters - separate data source implementations from the transaction management implementations).
Unlike Sample-jta-spring, the starting point for integrations with the transaction management system - although done only once - are a little more distributed:
In order to simplify transaction manager access from various places, we use a utility class Transactions. This class uses components in com.zfabrik.samples.jta-plain and effectively de-couples the JTA implementation from its access points. This class is used for
- Jetty Web Container integration:
In order to provide user transaction access via the standard JNDI name java:comp/UserTransaction (although not strictly needed in the example), we adapted jetty.xml accordingly. Check the lines starting with
<New id="tx" class="org.eclipse.jetty.plus.jndi.Transaction">...
- Hibernate integration:
Hibernate accesses the transaction manager via our custom AtomikosJTAPlatform (see also http://stackoverflow.com/questions/20681245/how-to-use-atomikos-transaction-essentials-with-hibernate-4-3) as declared in the persistence unit
Updated by Henning Blohm 11 months ago · 26 revisions