
Step 3 - First steps with Z2 on SVN » History » Revision 5
« Previous |
Revision 5/27
(diff)
| Next »
Udo Offermann, 13.09.2012 14:56
Step 4 - First steps with Z2 on SVN
Step 3 - First steps with Z2 on Git describes how to develop Z2 applications with Git using the Eclipse IDE. Z2 also supports SVN which we will shown you now.
The overall approach is the same: The single parts of the z2-environment - such as the core, base, add-ons, application - are stored in repositories,
and Z2 loads the source code and 3rd party libraries on-demand from SVN using SVNKit. In opposite to Git one will put the single z2-repositories
(we call them component repositories, because they are the sources for the z2 components) into one SVN repository installation.
Prerequisites
You need a properly setup JDK 6 on Linux, Mac OS X or Windows - that's all.
A halfway modern system will do.
This how-to uses the SVN VCS (we're using SVN version 1.6 and 1.7). You can also run Z2 together with Git as described on Step 2 - Install and run in 5 minutes and Step 3 - First steps with Z2 on Git.
For Eclipse-SVN integration we are using Subclipse, which is also supported by the Z2 Eclipsoid plug-in. You can also use Subversive however there is no Eclipsoid-Subversive integration so far.
Creating a home for Z2
The folder layout is a bit simpler with SVN because SVN workspace and Eclipse workspace can overlap.
Create a folder called z2-base inside your favorite/home/development/what-ever directory and enter it. This will be the home for our Z2 installation and the Eclipse workspace:
:dev$ mkdir z2-base
:dev$ cd z2-base
Cloning the Z2 core
Start Eclipse and choose z2-base as workspace. Go to the SVN repository perspective and add a new repository location "svn://z2-environment.net/z2-master/trunk/z2-base.core".
Right-click the new entry and choose "Checkout..." and simply click "finish" on first "Checkout from SVN" wizard page. The core will be downloaded into your Eclipse workspace and opened as project "core".
Switch back to the Java perspective and dive into the core project. You will see two "z2_base*.launch" files - right-click the one that matches your OS and choose "Run As >" / "z2_base".
The Z2 server will be started inside a new window showing some log messages where the last one should be "... Completed worker process initialization".
In Eclipse go to menu "z2-environment" and choose "z2-Repositories View" - a new view should open inside the lower views-tab:
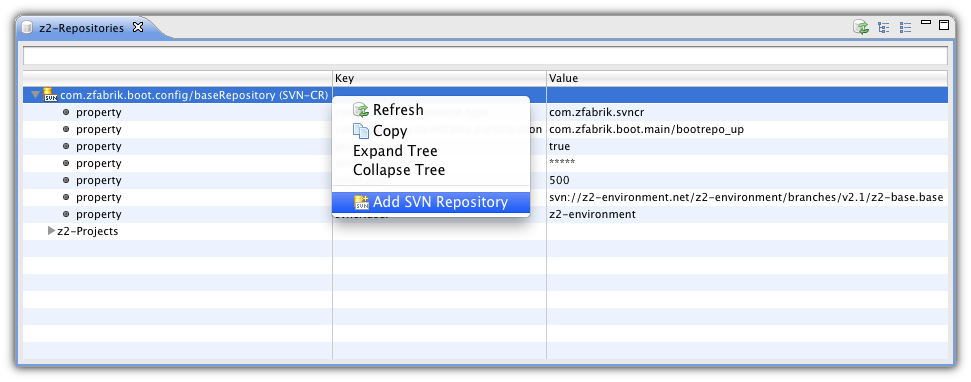
Right-click the "environment/samplesRepository" entry and choose "Add SVN repository" - this will only work if you installed the Subclipse plug-in. (Subversive is not supported yet. But you can copy the SVN Url from the SVN properties: look for the property called "svncr.url" inside the "z2-Repositories" view or inside the general Eclipse properties view when the entry "environment/samplesRepository" is selected. Now you can right-click the property and copy the value to the clipboard. Add this SVN URL to your Subversive repositories list).
Updated by Udo Offermann over 13 years ago · 5 revisions