
Sample-hibernate-basic » History » Revision 28
« Previous |
Revision 28/37
(diff)
| Next »
Henning Blohm, 01.03.2020 21:43
A plain Hibernate on Z2 sample
Note that Hibernate is used in other samples as well, such as Sample-jta-plain, Sample-jta-spring, and others. This sample shows the minimal things to do to use Hibernate as an implementation of the Java Persistence API (JPA).
This sample is stored in the repository z2-samples.hibernate.basic.
This sample makes use of the Hibernate Add-on and is most likely the best documentation on how to use its supporting functionality. While some of the possibly complex seeming (but only needed once) glue code below is not required when using Spring (for example), as in Sample-spring-hibernate, Sample-springds-hibernate, this sample is most instructive on how Hibernate, Transaction Management, Z2, and the Jetty Web Container integrate with one another while closely sticking to standard descriptors (JPA) and naming (Java EE JNDI/Servlet).
Prerequisites
Z2 has the following Java Version requirements
| Z2 Version | Min. Java version required | Max Java version supported | Max language level |
|---|---|---|---|
| 2.1 - 2.3.1 | Java 6 | Java 7 | Java 7 |
| 2.4 - 2.5 | Java 8 | Java 8 | Java 8 |
| 2.6 | Java 9 | Java 11 | Java 10 |
| 2.7 | Java 9 | Java 11 | Java 11 |
| 2.8 | Java 9 | Java 13 | Java 13 |
| 2.9b | Java 8 | Java 8 | Java 8 |
| 2.9.1 | Java 11 | Java 16 | Java 15 |
| 2.9.1b | Java 8 | Java 8 | Java 8 |
| 2.10 | Java 11 | Java 18 | Java 18 |
| 2.10.1 | Java 11 | Java 21 | Java 18 |
| 2.10.2 | Java 11 | Java 21 | Java 18 |
| 3.0 | Java 17 | Java 23 | Java 23 |
| master | Java 17 | ? | Java 23 |
Note: Most samples suggest to use the master branch. You may choose another version branch (please check the respective repository).
Make sure you have a corresponding Java Development Kit (JDK) or Java Runtime Environment (JRE) installed. If in doubt, go to Download Java SE.
Note: Running v2.1-v2.3.1 on Java 8 is supported by specifying
com.zfabrik.java.level=7
(or 6, if that is your desired compilation language level) in <home>/run/bin/runtime.properties. By this the Java compiler version detection does not fall back to a lower level.
You need to run Java DB as network server on localhost. This is explained next.
The application will create a database "z2-samples"
Running a Java DB Network Server
Previously to Java 9, the Java SE Development Kit (JDK) by Oracle provided the Java DB - essentially the same as the Apache Derby DB. That is not the case anymore. However, we use that Database implementation in our samples. In order to run those samples that illustrate use of a relational database, please follow the instructions below to install and run Apache Derby. Could hardly be simpler.
Step 1: Download and Install
Unless you have done so already, download Apache Derby DB and follow the installation how-to.
Note: You do not need to unpack Apache Derby into some global folder on your system. Instead you may want to use some local folder under your user's home folder. There is no problem installing and runnning different instances and configurations at any time.
Step 2: Run
Let's assume you installed (well - unpacked) into a folder $DERBY_INSTALL. Also, let's assume some Java Runtime Environment is installed and ready.
Simply run the following on Linux or Mac OS:
cd $DERBY_INSTALL
java -jar lib/derbyrun.jar server start
On Windows run
cd %DERBY_INSTALL
java -jar lib\derbyrun.jar server start
That's it. Apache Derby will be waiting for connections on port 1527.
Run the sample
If you have the database, the fastest way to verify whether it runs is:
mkdir install
cd install
On Mac-OS or Linux run:
wget http://download.z2-environment.net/z2/z2-base-v3.0.zip
unzip z2-base-v3.0.zip
On Windows download the archive and unpack using the Windows explorer. Make sure to unpack into the installation folder previously created.
This will create a folder z2-base.core that contains the complete version 3.0 z2-base installation.
Check out the sample
git clone -b v2.8 https://www.z2-environment.net/git/z2-samples.hibernate-basic
On Mac OS or Linux run:
cd z2-base.core/bin
./gui.sh
On Windows run:
cd z2-base.core\bin
gui.bat
(In order to check that z2 is up, when you see "Completed home process initialization", try http://localhost:8080/adm with user "z*" and password "z".)
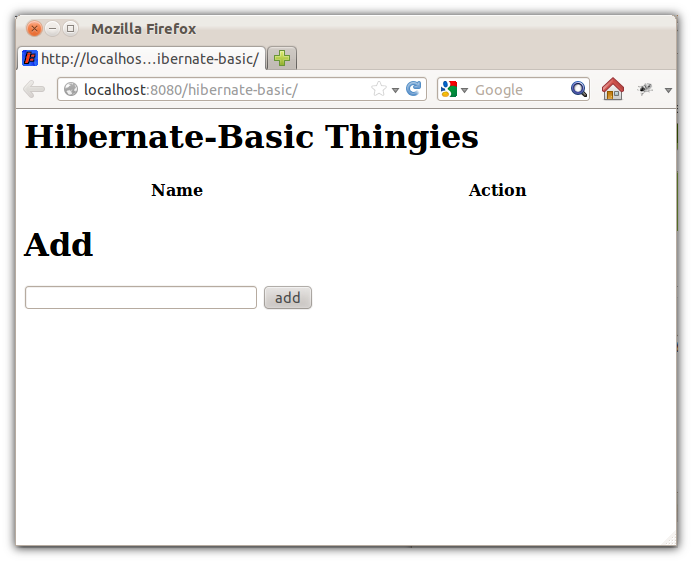
When started, go to http://localhost:8080/hibernate-basic. You should see this:
Details
A lot of the things happening here relate to what is explained in How to transaction management.
The assumption of this example is that of a re-use domain module com.zfabrik.samples.hibernate-basic.domain that implements a "Thingy Repository" and is used from a web application that is in another module com.zfabrik.samples.hibernate-basic.web. The domain module exposes the Thingy Repository as a Z2 component that is bound by the Web app as an environment (ENC) variable and injected into the controller filter by the Web container.
The domain module makes use of Hibernate's JPA implementation and integrates with the transaction management provided by com.zfabrik.jta.
Now, step-by-step.
The domain module and its persistence context
The domain module com.zfabrik.samples.hibernate-basic.domain defines a persistence unit "thingies" in java/src.impl/META-INF/persistence.xml, i.e. in its implementation. That makes sense, as the XML file will be looked up with a class loader and we do not intent to retrieve from another module. Or, put differently, the persistence unit is not part of the module's API.
In order to integrate with the built-in transaction management the persistence.xml declares the JTA data source
<jta-data-source>components:com.zfabrik.samples.hibernate-basic.domain/DB</jta-data-source>
and the JTA Platform (Hibernate's transaction management abstraction since v4.3)
<property name="hibernate.transaction.jta.platform" value="com.zfabrik.hibernate.Z2JtaPlatform"/>
The former points to the data source component com.zfabrik.samples.hibernate-basic.domain/DB, while the latter makes sure Hibernate can register with the transaction manager implementation that comes built-in with Z2 (other samples, such as Sample-jta-plain, Sample-springds-hibernate show alternative approaches).
The persistence unit defines only one entity. The Thingy as in Thingy.java. That is an API-exposed type. We use the simplified pattern of exposing persistent objects in the API rather than using Data Transfer Objects (DTOs).
Also, the domain module exposes the interface of the Thingy Repository. This interface is used by the Web application to retrieve, store, and delete thingies.
The implementation of the Thingy Repository, ThingyRepositoryImpl is not a public type. Instead, it is instantiated and held on to via a Z2 component lookup from the Web app on the component com.zfabrik.samples.hibernate-basic.domain/repository.
In ThingyRepositoryImpl, in order to access and re-use the JPA Entity Manager for the persistence unit "thingies" we use EntityManagerUtil from org.hibernate with a Entity Manager Factory that we create upon service instantiation and using the user transaction implementation of com.zfabrik.jta:
public class ThingyRepositoryImpl implements ThingyRepository {
    private EntityManagerFactory emf;

    /**
     * Create the repo
     */
    public ThingyRepositoryImpl() {
        /*
         * We switch the context class loader so that Hibernate finds our persistence.xml.
         * We use the EntityManagerUtil so that Hibernate doesn't freak out in a
         * no-Initial-Context-Factory (but URL for lookup) naming environment.
         */
        this.emf = ThreadUtil.cleanContextExecute(
            this.getClass().getClassLoader(),
            new Callable<EntityManagerFactory>() {
                @Override
                public EntityManagerFactory call() throws Exception {
                    return EntityManagerUtil.createEntityManagerFactory("thingies");
                }
            }
        );
    }

    @Override
    public void store(Thingy thingy) {
        this.em().persist(thingy);
    }

    @SuppressWarnings("unchecked")
    @Override
    public Collection<Thingy> findAll() {
        return this.em().createQuery("select t from Thingy t").getResultList();
    }

    @Override
    public void delete(int id) {
        Thingy t = this.em().find(Thingy.class, id);
        if (t != null) {
            this.em().remove(t);
        }
    }

    //
    // Uses the Entity Manager Util that holds on to EMs created from the passed on EMF
    // while the transaction is still open.
    //
    private EntityManager em() {
        return EntityManagerUtil.getEntityManager(
            IComponentsLookup.INSTANCE.lookup(
                "com.zfabrik.jta/userTransaction",
                TransactionManager.class
            ),
            this.emf
        );
    }
}
Note that when creating the entity manager factory, we have to make sure the right context class loader is set so that the persistence unit definition will be picked up by Hibernate. This is a general pattern when initializing services in a modular application: You need to distinguish when the service's context matters vs. when the caller's context matters (check out a blog article on that).
We would normally use the JPA class Persistence to create an entity manager factory. Due to HHH-8818 we do need to work around some JNDI issue by using the EntityManagerUtil (see its source code here).
The web module, transaction boundaries, and service re-use
Let's turn to the Web application in com.zfabrik.samples.hibernate-basic.web/web. And let's start with how the Thingy Repository is accessed from the Web app. In this example we do not use Spring or direct lookups, instead we use the Web container provided dependency injection mechanisms. In WebContent/WEB-INF/jetty-env.xml we bind the result of a JNDI lookup for the repository implementation component to the Environment Naming Context (ENC) variable "repos/thingies". This is java EE mechanics. It means that from within the Web app, the repository is available under the JNDI name "java:comp/env/repos/thingies":
<Configure class="org.eclipse.jetty.webapp.WebAppContext">
  <New id="thingyRepository" class="org.eclipse.jetty.plus.jndi.Resource">
    <Arg>repos/thingies</Arg>
    <Arg>
      <New class="javax.naming.LinkRef">
        <Arg>components:com.zfabrik.samples.hibernate-basic.domain/repository?type=com.zfabrik.samples.hibernate_basic.thingies.ThingyRepository</Arg>
      </New>
    </Arg>
  </New>
</Configure>
See also Jetty JNDI.
Anyway. Now, in the ControllerFilter we inject the Thingy Repository like this:
public class ControllerFilter implements Filter {

    // inject thingies repository (see WEB-INF/jetty-env.xml)
    @Resource(name="repos/thingies")
    private ThingyRepository thingyRepository;

...
}
Alternatively, if you think this is a little overkill, you might as well use a direct lookup, either with JNDI using the name in the XML or via Z2's component lookup
IComponentsLookup.INSTANCE.lookup("com.zfabrik.samples.hibernate-basic.domain/repository",ThingyRepository.class);
Finally a word on transaction management. Transaction boundaries are controlled by the TransactionFilter contained in the sample. We make use of TransactionUtil from com.zabrik.jta to wrap the actual web app request in a transaction:
@Override
public void doFilter(final ServletRequest sreq, final ServletResponse sres,    final FilterChain chain) throws IOException, ServletException {
  HttpServletRequest req = (HttpServletRequest) sreq;
  if (req.getDispatcherType()==DispatcherType.REQUEST || req.getDispatcherType()==DispatcherType.ASYNC) {
    try {
      TransactionUtil.run(
        (UserTransaction) new InitialContext().lookup("java:comp/UserTransaction"),
        new Callable<Void>() {
          public Void call() throws Exception {
            chain.doFilter(sreq, sres);
            return null;
          }
        }
      );
    } catch (Exception e) {
      throw new ServletException(e);
    }
  } else {
    chain.doFilter(sreq, sres);
  }
}
Finally note that we retrieved the transaction manager via the standard Java EE JNDI name java:comp/UserTransaction. Z2 uses Jetty as its Web container implementation. In order to have Jetty bind the transaction manager, we configure the Web server in environment/webServer/jetty.xml to retrieve the built-in transaction manager:
...

    <New id="tx" class="org.eclipse.jetty.plus.jndi.Transaction">
        <Arg>
            <New class="com.zfabrik.tx.UserTransaction">
            </New>
        </Arg>
    </New>
...
How this sample makes use of MVNCR
This sample in conjunction with the Hibernate add-on is good example on how to use the Maven component repository (see How to Access a Maven Repository).
The situation is this:
- The add-on (the Hibernate add-on in this case) defines the artifacts required but may not define the actual artifact repository to use. After all it may be used with a locally hosted artifact repository.
- The solution environment (in this case this sample) may define the actual artifact repository but it should not need to repeat all the details on the actual artifact names and versions
To resolve this we use Maven component repository declarations and Maven component repository fragment declarations.
- The repository declared as part of the sample in environment/mavenDefault has all the information on where to get artifacts from, while
- the fragment declared in the add-on at org.hibernate/mvnFragment declares the dependency roots it needs to have resolved from the (yet unknown - from the perspective of the add-on) MVNCR environment/mavenDefault.
Updated by Henning Blohm about 6 years ago · 28 revisions